Register yourself to get hired soon:- Register Now
Hey Guys in this article we are going to create top two projects for beginners using HTML, CSS, and JavaScript.
- Todo List
- Weather App
Hy dear. Welcome to W3hiring. In this article, we are going to see that how to create a to-do list using HTML, CSS, And JavaScript. In this article, we will provide whole the code which you can run on any online platform or on your local machine.
How This mini Project is usefull for you.
If you are a beginner you can make this mini project for learning purposes as well as you mention this project in your resume to make a solid and impressive resume. which will help you to crack the interview easily.
so before starting let me tell you some prerequisites for this small project.
Prerequisites:-
- Basic Knowledge of HTML Tags
- Basic Knowledge of CSS Properties
- And A middle level Knowledge of Java Script.
If you have a basic knowledge of HTML, CSS, and JavaScript then you are good to go. If you a very beginner and even you don’t know simple coding of HTML CSS and javaScript then don’t worry. We will explain every line of code and we will show you everything using screenshots.
Let’s start code and explain everything line by line.
<!DOCTYPE html>
<html>
<head>
    <meta charset='utf-8'>
    <meta http-equiv='X-UA-Compatible' content='IE=edge'>
    <title>Page Title</title>
    <meta name='viewport' content='width=device-width, initial-scale=1'>
      <link rel="stylesheet" href="https://maxcdn.bootstrapcdn.com/bootstrap/3.4.1/css/bootstrap.min.css">
    <link rel='stylesheet' type='text/css' media='screen' href='style.css'>
</head>
<body>
//we can write everything here. what we want to show on browser window screen.
</body>
<html>
Starter Template of HTML
A Starter HTML Template is also called a Boiler Template. An HTML template typically includes the following parts
- The document type declaration (or doctype)
- The html Element.
- The character encoding
- The viewport meta element.
- Title, description , and author
- Open Graph meta elements for social cards
- Favicons and Touch icons
- Links to Stylesheets and Scripts
If you want to learn in detail about all the parts of the HTML Template, visit here
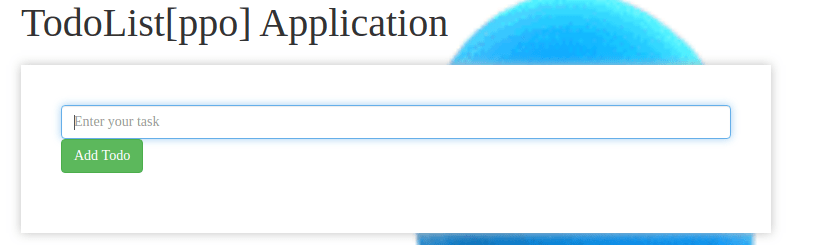
We have created a starter HTML template, it’s time to create the structure of the to-do list.
<!DOCTYPE html>
<html>
<head>
    <meta charset='utf-8'>
    <meta http-equiv='X-UA-Compatible' content='IE=edge'>
    <title>Page Title</title>
    <meta name='viewport' content='width=device-width, initial-scale=1'>
      <link rel="stylesheet" href="https://maxcdn.bootstrapcdn.com/bootstrap/3.4.1/css/bootstrap.min.css">
    <link rel='stylesheet' type='text/css' media='screen' href='style.css'>
</head>
<body>
       <section class="O-todo">
          <div class="container">
            <div class="row justify-content-md-center">
              <div class="col-sm-12 col-md-8">
                <h1>TodoList[ppo] Application</h1>
                <div class="I-todo">
                  <div class="form-row">
                    <div class="col-8 mr-sm-2">
                      <input type="text" class="form-control" placeholder="Enter your task" id="addtaskinput" />
                      <input type="hidden" id="saveindex">
                    <button type="button" class="btn btn-success mr-sm-2" id="addbtn">
                      Add Todo
                    </button>
                    <button type="button" class="btn btn-success mr-sm-2" id="savebtn" style="display: none;">
                      Save Todo
                    </button>
                </div>
                 </div>
                  <div class="to-do-output">
                    <table class="table table-striped mt-3 mb-0" id="todoList">

                    </table>
                  </div>
                </div>
              </div>
            </div>
          </div>
        </section>
<script src='app.js'></script>

</body>
</html>Section:- The section tag defines a section in the document. It can specify a peculiar space as a section.
Div:- Div is almost similar as a section. It also defines a section in the document. As well as it can be used for division. if you want to divide a particular into multiple parts. it will be a better choice to do it easily.
Button:- Button tag is used to make a clickable button. we can put any text inside the button tag. the text will be put as it is on the button. we can use different font styles. like <b> tag for bolt the text, <i> tag for italic style of the text etc;
Container:- Containers are the most basic layout element in Bootstrap and the containers are required when using our default grid system. When we need to center the content or want to give padding to the content we use Containers for this work. While containers can be nested, most layouts do not require a nested container.
TodoList Application
body{font-family: 'Roboto-Regular';background: #b3b5c4;
  background-image: url('https://i.pinimg.com/originals/7c/32/a5/7c32a55addb36997a2227c7d94b75cce.gif');
  background-size:cover;
  height: 100vh;
  padding:0;
  margin:0;
}
  section.O-todo {
      width: 100%;
      padding: 30px 0;
  }
  section.O-todo h1 {
      font-size: 40px;
      margin-bottom: 20px;
  }
  .I-todo {
      width: 100%;
      float: left;
      padding: 40px;
      box-shadow: 0px 0px 10px #c1c1c1;
      background: #fff;
  }
  table tr td button {
    border: 2px solid black;
      background: no-repeat;
      border: none;
      padding: 0;
      cursor: pointer;
  }
  .completed{text-decoration: line-through;}
We have completed our Webpage. Now we have to use some CSS properties to make it beautifull and interactive. Html is just like the Structure of the body CSS is the skin that makes us beautiful and handsome. So for that, we are going to use some basic and important properties.
Background Image:- As the Name of the CSS property works similarly. it will place an image on the back side of our webpage.
Margin:- It is used to give extra space between two components or widgets.
Padding:- Padding is the space that is inside the element between the element and the border. padding will work on all sides at the same time. We can target and change the padding for each side
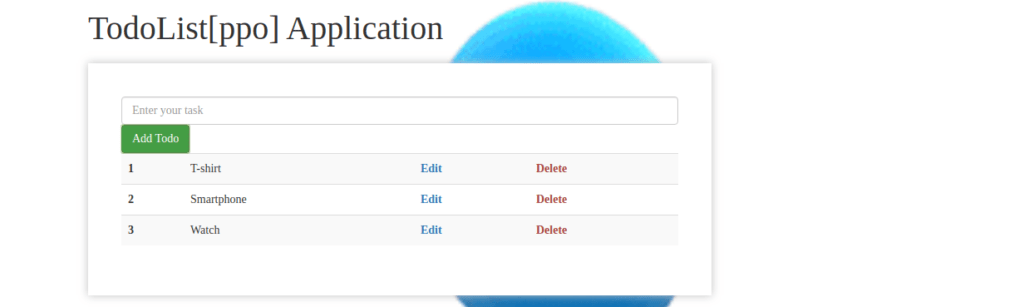
As we can see above. We created Three basic operations for Our to-do list.
- Add TODO
- Edit
- Delete
We used Javascript to create all of those operations.
showTodoList();
let addtaskinput = document.getElementById("addtaskinput");
let addbtn = document.getElementById("addbtn");
addbtn.addEventListener("click", function(){
    addtaskinputval = addtaskinput.value;
    if(addtaskinputval.trim()!=0){
        let webtask = localStorage.getItem("localtask");
        if(webtask == null){
            taskObj = [];
        }
        else{
            taskObj = JSON.parse(webtask);
        }
        taskObj.push({'task_name':addtaskinputval, 'completeStatus':false});
		// console.log(taskObj, 'Ashendra');
        localStorage.setItem("localtask", JSON.stringify(taskObj));
        addtaskinput.value = '';
    }
    showTodoList();
})
// showTodoList
function showTodoList(){
    let webtask = localStorage.getItem("localtask");
    if(webtask == null){
        taskObj = [];
    }
    else{
        taskObj = JSON.parse(webtask);
    }
    let html = '';
    let todoList = document.getElementById("todoList");
    taskObj.forEach((item, index) => {
        if(item.completeStatus==true){
            taskCompleteValue = `<td class="completed">${item.task_name}</td>`;
        }else{
            taskCompleteValue = `<td>${item.task_name}</td>`;
        }
        html += `<tr>
                    <th scope="row">${index+1}</th>
                    ${taskCompleteValue}
                    <td><b><button type="button" onclick="editbtn(${index})" class="text-primary"></i>Edit</button></b></td>
                   <td><b><button type="button" onclick="deteletodo(${index})" class="text-danger"></i>Delete</button></b></td>
                </tr>`;
    });
    todoList.innerHTML = html;
}
// editbtn to edit a perticuler item
function editbtn(index){
    let saveindex = document.getElementById("saveindex");
    let addbtn = document.getElementById("addbtn");
    let savebtn = document.getElementById("savebtn");
    saveindex.value = index;
    let webtask = localStorage.getItem("localtask");
    let taskObj = JSON.parse(webtask);

    addtaskinput.value = taskObj[index]['task_name'];
    addbtn.style.display="none";
    savebtn.style.display="block";
}
// savebtn to save item after edit it
let savebtn = document.getElementById("savebtn");
savebtn.addEventListener("click", function(){
    let addbtn = document.getElementById("addbtn");
    let webtask = localStorage.getItem("localtask");
    let taskObj = JSON.parse(webtask);
    let saveindex = document.getElementById("saveindex").value;

    for (keys in taskObj[saveindex]) {
        if(keys == 'task_name'){
            taskObj[saveindex].task_name = addtaskinput.value;
        }
      }
    savebtn.style.display="none";
    addbtn.style.display="block";
    localStorage.setItem("localtask", JSON.stringify(taskObj));
    addtaskinput.value='';
    showTodoList();
})
// fuction to delete a perticuler item
function deteletodo(index){
    let webtask = localStorage.getItem("localtask");
    let taskObj = JSON.parse(webtask);
    taskObj.splice(index, 1);
    localStorage.setItem("localtask", JSON.stringify(taskObj));
    showTodoList();
}
Let’s understand some important concepts of javascript which we have used inside this project. We create three basic functions
- ShowToDo-list():- Uses to show a perticuler product after clicking at the Add todo button.
- editbtn():- it will allow use to edit a perticuler product.
- Deletetodo() :- If we have created a wrong product or we want to remove a perticuler product we can use delete button to remove.
Project 2.
Weather App using HTML, CSS, JavaScript
we will use OpenWeatherMap API to get the data of weather., we will provide whole the code which you can run on any online platform or on your local machine.
How This mini Project is usefull for you.
If you are a beginner you can make this mini project for learning purposes as well as you mention this project in your resume to make a solid and impressive resume. which will help you to crack the interview easily.
so before starting let me tell you some prerequisites for this small project.
Prerequisites:-
- Basic Knowledge of HTML Tags
- Basic Knowledge of CSS Properties
- And A middle level Knowledge of Java Script.
If you have a basic knowledge of HTML, CSS, and JavaScript then you are good to go. If you are a very beginner and even you don’t know simple coding of HTML CSS and javaScript then don’t worry. We will explain every line of code and we will show you everything using screenshots.
Let’s start code and explain everything line by line.
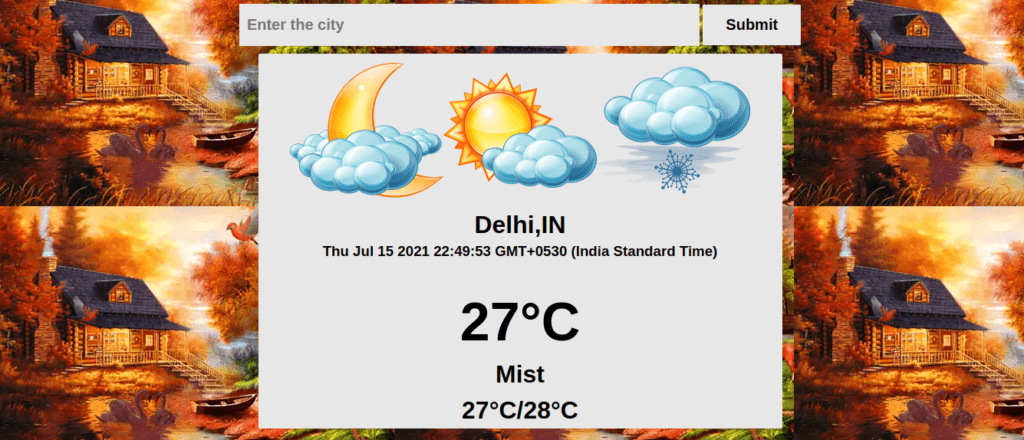
As you can see above. we will build a weather app like that. we will use the input field at the top to give user input. after submitting the state name through the user we will show data related to weather through OpenWeatherMap API.
Let’s start the code.
<!DOCTYPE html>
<html lang="en">
<head>
  <meta charset="UTF-8">
  <meta name="viewport" content="width=device-width, initial-scale=1.0">
  <meta http-equiv="X-UA-Compatible" content="ie=edge">
  <title>OpenWeatherMap Api</title>
  <link rel="stylesheet" href="style.css">
</head>
<body>
  <div class="main">
    <div class="header">
      <h1>Weather App Using OpenWeatherMap API</h1>
      <p><b>Enter any city name in the input box below to get the data</b></p>
    </div>

    <div class="input">
      <input type="text" placeholder="Enter the city" class="input_text">
      <input type="submit" value="Submit" class="submit">
    </div>
  </div>
  <div class="container">
    <div class="card">
      <div class="box">
        <img src="https://freepngimg.com/thumb/weather/86910-weather-water-forecasting-computer-icons-download-hq-png-thumb.png">
        <img src="https://freepngimg.com/thumb/weather/23698-6-weather-transparent-background-thumb.png">
        <img src="https://freepngimg.com/thumb/weather/23702-1-weather-transparent-thumb.png">
      </div>
      <div class="box">
    <h1 id='cityname'></h1>
    <h1 id='countrycode'></h1>
  </div>
    <h3 id="DT"></h3>
    <br>
    <br>
    <h1 id='temp'></h1>
    <h1 id='visibility'></h1>
    <div class="box">
    <h1 id='temp_min'></h1>
    <h1 id="temp_max"></h1>
    </div>
    </div>
  </div>
<script src="app.js"></script>
</body>
</html>
Starter Template of HTML
*{
    margin:0;
    padding: 0;
    box-sizing: border-box;
  }

  body{
    font-family: "Nunito",sans-serif;
    background: #1637f7;
    background-image: url('https://thumbs.gfycat.com/BestDependentGodwit.webp');
  }

  .input{
    text-align: center;
    margin: 10px auto;
  }

  input[type="submit"]{
    padding: 15px 30px;
    background: #e7e7e7;
    border: none;
    border-radius: 1px;
    font-family: "Nunito",sans-serif;
    font-weight:bold;
    font-size: 20px;
  }

  .input input[type="text"]{
    width: 600px;
    height: 55px;
    padding: 5px 10px;
    background: #e7e7e7;
    border: none;
    border-radius: 1px;
    font-family: "Nunito",sans-serif;
    font-weight:bold;
    font-size: 20px;
  }

  .card{
    width: 50%;
    background: #e7e7e7;
    height: 75%;
    margin: 2px auto;
    border-radius: 2px;
  }

  .header{
    text-align: center;
    color: rgb(38, 235, 114);
    background-color: #1637f7;
  }

  .close{
    float: right;
    margin-top: -2px;
    cursor: pointer;
    margin-right: 20px;
  }

  .card h1{
    padding: 5px 0;
    text-align: center;
  }
  .card h1:hover{
    border: 2px solid black;
    background-color:blue;
    text-shadow: 1px;
    font-style:initial;
  }
  .card h3:hover{
    border: 2px solid black;
    background-color:cyan;
    text-shadow: 1px;
    font-style:initial;
  }
  .box{
    display:flex;
    justify-content:center;
    flex-wrap: wrap;
  }
  #DT{
    display:flex;
    justify-content:center;
  }
  #temp{
    font-size: 70px;
  }
We are going to use javascript for validation and make it interactive.
QuerySelector:– Queryselctor can select the first element that matches a specified CSS selector in the document.
Syntex of Queryselector: document.querySelector(‘#id’)
we select all the elements created on the webpage one by one and store those in a variable. after that using that we print the data through OpenWeatherMap API.
For Example:-
 <div class="input">
      <input type="text" placeholder="Enter the city" class="input_text">
      <input type="submit" value="Submit" class="submit">
    </div>
we have created an input field on the webpage using the above code where a user can fill state name. but how a machine can understand that it is a state name or not. for that, we have to use OpenWeatherMap API, and for validations for that, we will use javascript. we can connect the input field to validations through the class names as we have given as Input_text.
var input = document.querySelector('.input_text');input_text class will select that input field and it will store the input value or state name is the variable named input. And then we perform validations and event listeners for a particular button.

we use some basic elements like button, input, etc we have discussed all of them in the earlier articles please visit and understand the concept.
EventListener:- The addEventListener() method attaches an event handler to a particular element without overwriting existing event handlers.
we can add many event handlers to one element.
var input = document.querySelector('.input_text');
var button= document.querySelector('.submit');
let cityName= document.getElementById(cityname)
let countryCode=document.getElementById(countrycode)
let Dt=document.getElementById(DT)
let Temp=document.getElementById(temp)
let Visibility=document.getElementById(visibility)
let tempMin=document.getElementById(temp_min)
let tempMax=document.getElementById(temp_max)
button.addEventListener('click', function(cityName){
fetch('https://api.openweathermap.org/data/2.5/weather?q='+input.value+'&appid=f2e0c415b3cd556429c5df9dc563e9f3')
.then(response => response.json())
.then(data => {
    console.log(data);
    const cityName=data.name;
    const countryCode= data.sys.country;
    d = new Date()
    localTime = d.getTime()
    localOffset = d.getTimezoneOffset() * 60000
    utc = localTime + localOffset
    var atlanta = utc + (1000 * -14400)
    nd = new Date(atlanta)

    const Temp=parseInt(data.main.temp-277)+"°C";
    const Visibility=data.weather[0].main;
    const tempMin=parseInt(data.main.temp_min-277)+"°C";
    const tempMax=parseInt(data.main.temp_max-277)+"°C";
    cityname.innerHTML=cityName +",";
    countrycode.innerHTML=countryCode;
    DT.innerHTML=nd;
    temp.innerHTML=Temp;
    visibility.innerHTML=Visibility;
    temp_min.innerHTML=tempMin +"/";
    temp_max.innerHTML=tempMax;
    input.value="";
    // console.log(data.name);
    // console.log(data.main.temp);
    // console.log(data.main.temp_min)
    // console.log(data.main.temp_max)
    // console.log(data.sys.country)
    // console.log(data.visibility)
    // console.log(data.weather[0].main)
})
.catch(err => alert("Wrong city name!"));
})
we have tested all the code it’s working fine. we use console.log function for testing purpose you also can use it if you got any issue or error simply comment we will resolve.
Thanks for visiting our website. How you like this.